


Inverter Installations: A Do-It-Yourself Guide
The concept is simple: an inverter allows you to enjoy the conveniences of land-based electrical devices such as microwaves, coffee makers, blenders and TVs without having to run your generator or plug in to shore power. In the spirit of DIY projects, we will explain how to choose and install a new inverter on your boat. For those who already have an inverter, we will look at some of the common pitfalls to look for in an incorrect installation.
How Do Inverters Work and How do I Pick the Right One?
Inverters convert power from DC to AC, commonly 12V DC to 120V AC, allowing you to power smaller electrical devices. When choosing an inverter, it is important to think carefully about a few factors.
- Size Inverters vary in size and are gauged by wattage. The larger the inverter, the more devices you can run simultaneously. From our experience, the most popular model is 2,000 watts.
- Type There are two types of inverters, the modified sine wave and the true sine wave. We recommend purchasing a true sine wave for better performance—in the long run, the higher cost is worth it. The disadvantages associated with having a modified sine wave inverter often override its lower cost.
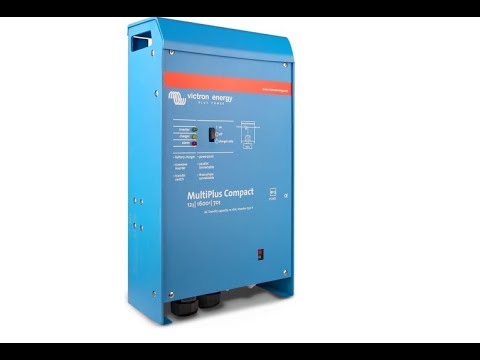
- Cost-effectiveness Most large inverters come with battery chargers. Purchasing an inverter/charger is more cost effective than purchasing two separate devices.
Common Pitfalls with Existing Inverter Installations
While performing electrical audits, we see many substandard inverter installations. These can be easily avoided
by being aware of the most common pitfalls.
- Having no on/off switch on the DC-positive inverter wiring. ABYC codes require an on/off switch. When servicing AC circuits on your boat, you need to disconnect the inverter. An on/off switch on the DC side is critical to ensure that the inverter is off.
- There are fusing issues. Inverters require very precise fusing, and it is important to follow ABYC standards, along with the manufacturer’s recommendations. These are the most common issues:
- There is no fuse.
- The fuse is located at the end of the circuit. This is incorrect; the fuse should be closer to the batteries, not the inverter.
- The wrong type of fuse was installed. Inverters require a Class T fuse, not an ANL fuse.
- The fuse is the wrong size. You must install the fuse to the exact recommendation of the manufacturer.
- The inverter is in the wrong area on the boat. Inverters are not ignition protected and cannot be installed in a potentially explosive environment such as a gasoline engine room.
- Large AC loads are wired to the inverter. Appliances such as water heaters and stovetops have large AC loads. Such large loads should be avoided on any inverter because they deplete the batteries. As a general rule, heat should never be created from battery power, because it consumes too much energy. It is better to use a generator or connect to shore power for large AC loads.
- The chassis ground connections use 10 or 12 gauge wire. Since an inverter has both AC and DC connections, the chassis ground connection must protect up to the largest wire. Therefore, chassis ground connections should always be equal to or one size smaller than the largest DC wire feeding the inverter.
Step-by -step Installation Process for an Inverter
- Find a suitable location for the inverter. The orientation of the inverter must be according to the specific manufacturer ’s recommendations. It is ideal to locate it close to but not directly above the batteries in order to minimize wire length and thus the wire size. The longer the wire, the more expensive the installation, often adding hundreds of dollars in costs. Also remember that lead acid batteries give out corrosive gases. If your boat has lead acid batteries, it is especially important not to locate the inverter directly above them.
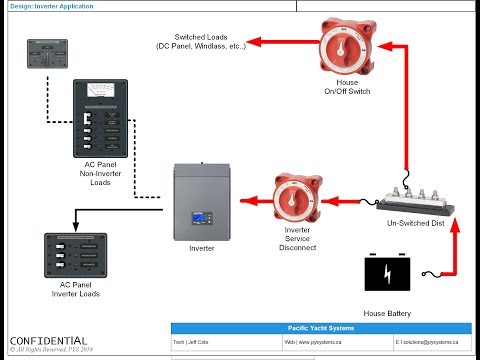
- Route AC wire from the AC panel to the inverter. This is the trickiest part of an inverter installation. Make sure you read, in detail, the different wiring configurations in the manufacturer’s instruction manual. There are many ways to integrate an AC inverter onto an AC panel. From our experience, the most popular approach is to have the inverter AC main input coming after the AC main breaker on your boat. Basically the AC main input breaks out into two paths. One leads directly to the inverter via the appropriate AC gauge wire (for instance 10/3 on a 2,000 watt model) and the other goes directly to the non-inverter AC loads on your existing AC panel.
- Divide existing AC loads into two AC subpanels. At this stage, make sure shore power is unplugged and the generator battery is isolated. It is important to capture only the AC loads that you really want to run off your batteries. Your existing AC panel needs to be divided into an AC Main subpanel and an AC Inverter subpanel. This inverter AC subpanel may include the AC outlets, a microwave and the TVs. It is important to divide not only the ungrounded AC wires (hot and black in colour) but also the grounded AC wires (neutral and white in colour) on a separate inverter AC grounded bus. Unfortunately the grounded wires are rarely labelled, and this makes the process of checking ungrounded and grounded pairings very timeconsuming.
- Route AC inverter output to AC inverter subpanel. At this stage, connect the inverter AC output to the inverter AC subpanel as mentioned above. This inverter AC subpanel must be fed via the inverter AC output only and not the main AC feed.
- Route the positive and negative DC connections from the battery bank to the inverter. To prevent wire chafing and the associated fire hazards, ensure that the DC wires are properly supported throughout their run every 10 inches, and use chafe guards wherever possible. Our technicians like to use convoluted tubing to further protect against chafing.
- Wire the DC disconnect switch and class T fuse for DC power to the inverter. The DC disconnect switch should be rated to support the maximum continuous running amperage of your inverter. Installing an undersized disconnect switch is a fire hazard. Locating the class T fuse correctly is critical, especially if you are using the class T fuse to protect both the inverter itself and the wire. In those circumstances, you want the class T fuse to be located as close as possible to the battery bank. Be sure to follow the manufacturer’s instructions exactly when choosing the size of your class T fuse.
- Wire the inverter chassis ground to negative distribution point. The chassis ground protects both the AC and DC wires (and the green earth wire protects the AC ground). Therefore the wire connection must be equal to or one size smaller than the largest wire connected to the inverter. For instance, a 2,000-watt inverter with a 2/0 wire connection needs a 2/0 or 1/0 chassis ground connection.
- Install a battery temperature sensor at correct location within battery bank. If your inverter comes with a charging function, it is critical to locate the temperature sensor on the batteries and not on the inverter/ charger. Specifically, it must be placed on the warmest battery in a group of batteries, typically the one in the middle. If this is done incorrectly, thermal runaway will occur (see our October, 2012 Tech Talk article to learn more about thermal runaway).
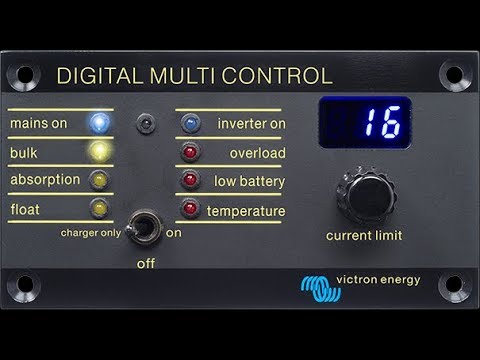
- Mount a remote panel for the inverter/charger control and monitoring. The remote display should be mounted in a location where one can easily observe the status of the inverter and also monitor any problems or faults. Remote panels are not weather- or waterproof, so locate your panel in a place where it cannot be damaged.
Installing an inverter on your boat is a great DIY project. If you have any trouble with the steps, contact a qualified marine electrician to assist you. Although you need to pay careful attention to the small details, doing this correctly can save time and money down the line. In the end, you will have an inverter that will help you enjoy the comforts of home on your boat.
About the author: Jeff Cote is the owner of Pacific Yacht Systems, a full service shop delivering marine electrical and navigation solutions for recreational boats. Visit their website and blog for info and articles on marine electrical systems, projects and more: www.pysystems.ca.

 $396.86
 $277.17


Related Content


![]()
Copyright © 2025 Pacific Yacht Systems.